


TX-CONNECT MP
How to use TX-CONNECT MP - Main screen
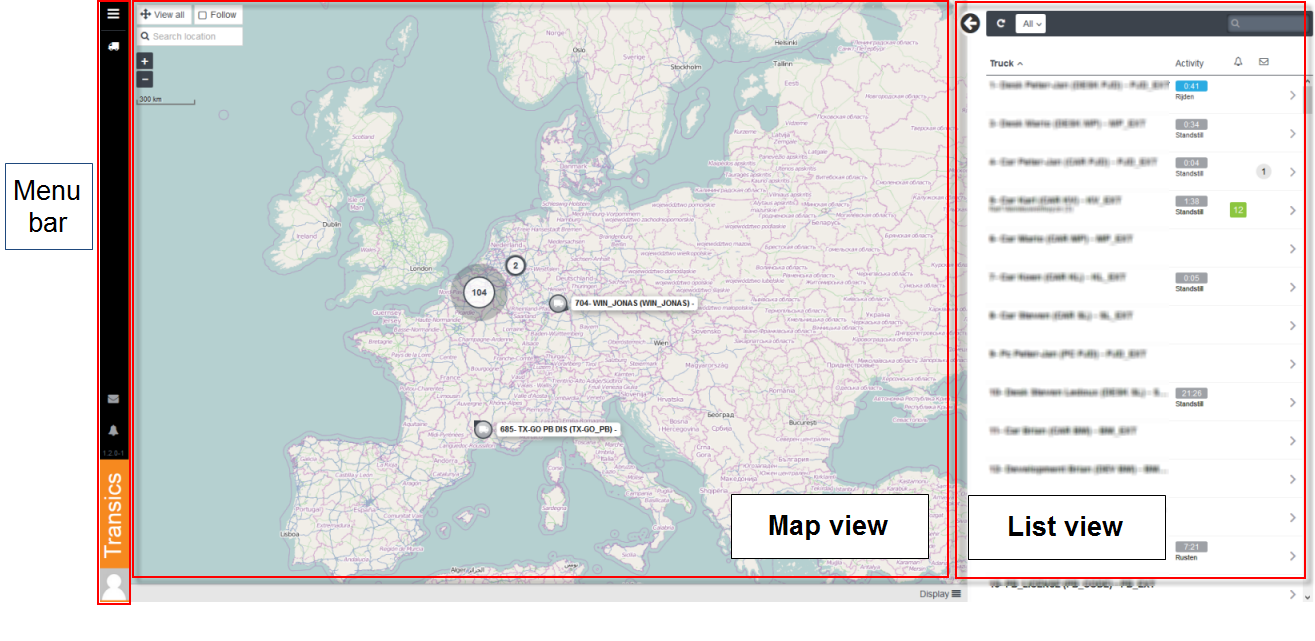
Menu bar
Click the Menu icon  to expand the menu bar:

Click an icon in the (collapsed or expanded) menu bar on the left to switch modules. The map icons and the list views will change according to the selected module:

|
Vehicle Follow-up |
 |
Messages |
 |
Alarms |
- Vehicle
Follow-up
Visualizes status of followed vehicles in the list view:
 |
Map icons according to vehicle status |
|
|
|
Driving
Note: the arrow indicates the driving direction |
|
|
|
Work / Availability |
|
|
|
Rest |
|


- Messages
Visualizes received messages of followed vehicles in the list view
 |
Map icons according to message status |
|
|
|
Read |
|
|
|
Unread |
|


- Alarms
Visualizes received alarms of followed vehicles in the list view
 |
Map icons according to alarm type and status |
|
|
New Viewed by user |
Info alarm:
|
|
|
New Viewed by user |
Warning alarm:
|
|
|
New Viewed by user |
Critical alarm:
|
|


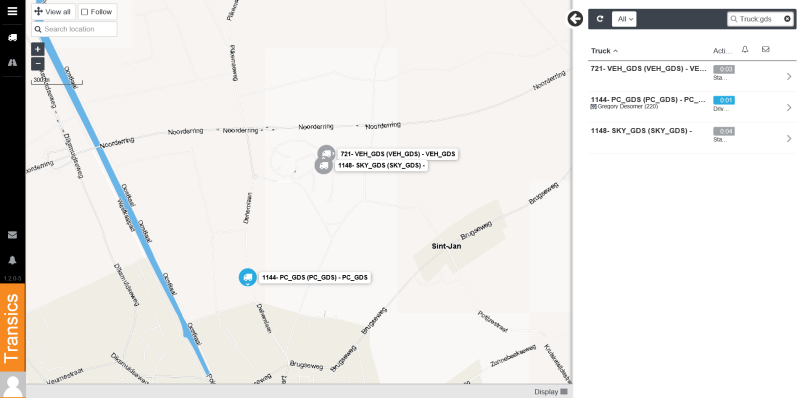
Map view
Available in all modules
View all |
|
Expand map view to view all followed vehicles. |
Follow |
|
Only show vehicles in the list view which are currently visible in the map view. |
Search location |
|
Enter a location to zoom in on. |
Zoom buttons |
|
Use the zoom buttons to zoom in or out. |
Grouped vehicle icon |
|
If vehicles are too close to each other to display, a group icon is displayed with the number of grouped vehicles. Click on a group icon to zoom in on the vehicles. |


List view
Available in all modules
Collapse / Expand list view |
|
Use the arrow button to expand or collapse the vehicle list. |
|
Refresh |
|
Manually refresh the vehicle list. |
|
Search box |
|
Search for a specific vehicle. |
|
Column headers |
Truck Location (Position from city) Activity Alert |
Message
Received Alert Description Time |
Click a column header to sort in ascending or descending order according to the selected column. |
Status Filter |
|
Use the status filter to show only the vehicle with the selected status, depending on the active module:
|
|


Next step: Vehicle Follow-up - detail screen
Previous step: How to use TX-CONNECT MP